As a wedding-photographer-turned-gift-curator, I’ve witnessed time and again the power of thoughtful client gifts. When done right, gifting has the power to elevate your brand experience, delight the socks off your clients, and turn them into loyal, raving fans.
Do you love the idea of client gifts as part of your brand experience, but struggle to deliver them consistently? Or perhaps you’re unsure of where to even start!
Let’s dive into three easy steps to DIY your client gifting and elevate your brand experience:
1. Determine When to Gift
To maximize the impact of your gift, be strategic with your timing.
Questions to ask yourself:
- When is my client most likely to experience buyer’s remorse during our time together?
- Hint: Immediately after booking! Sending a welcome gift can reinforce your client’s decision to book you.
- When is my client under the most stress during our time together?
- Example: If you’re a wedding vendor, your client might be most stressed in the final few weeks leading up to the big day. This can be a great time to gift by sending items to help de-stress & unwind!
- Is there a time when my client might feel forgotten during the experience?
- Example: If you’re a service-based business with a lengthy project time, there may be times when you’re not in touch with your client as much. This is a great opportunity to remind them (via gifting) how much you value them as a client!
By timing your gifts strategically, you’ll up the surprise + delight factor.
2. Curate an On-Brand Gift
Questions to ask yourself:
- What common interests do my clients share, if any?
- What brand experience do I want to create for my clients with this gift?
- Examples:
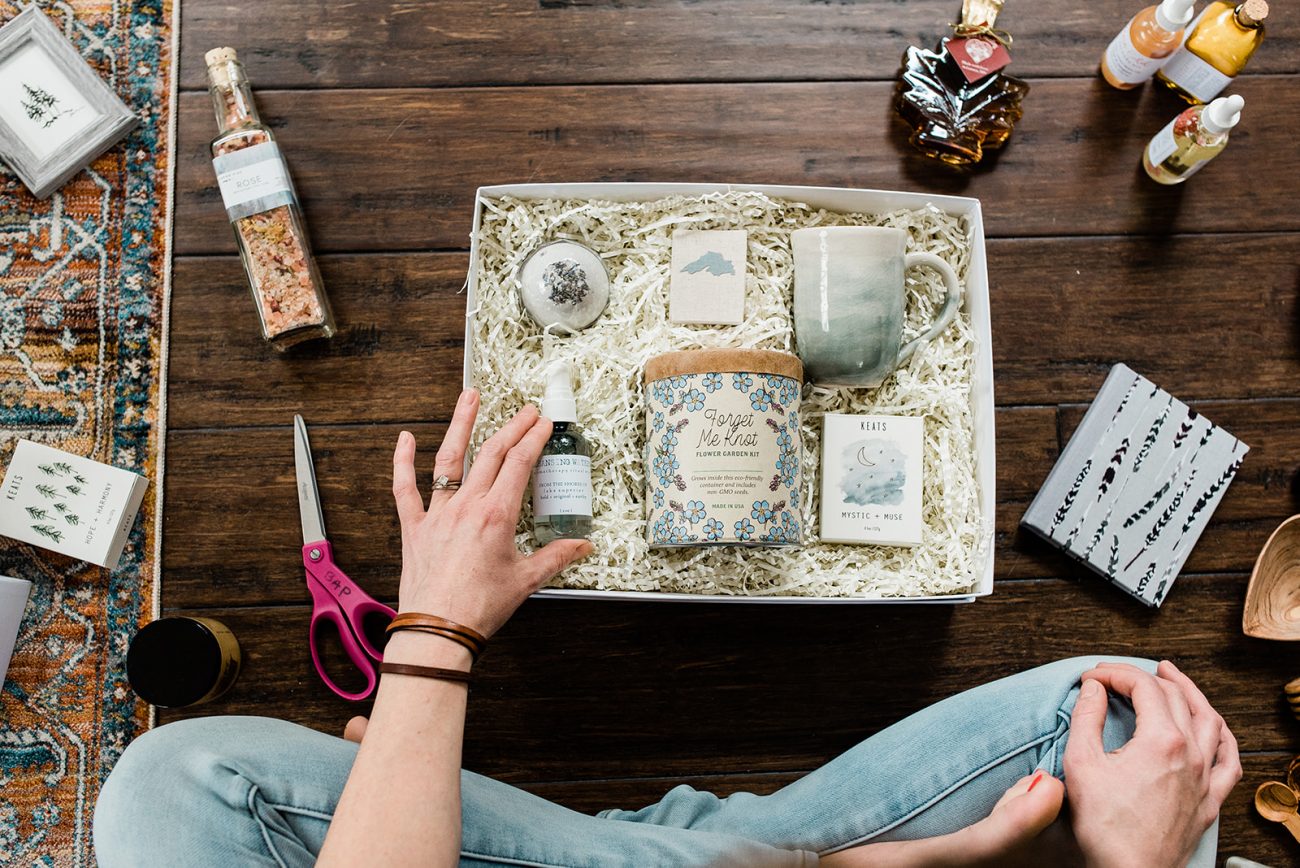
- For the adventurous client: An evening cozied up by an outdoor bonfire (marshmallows, firestarters, tin camp mugs, etc.)
- For the foodie client: A Sunday morning brunch at home (pancake mix, syrup, tea towel, coffee, etc.)
- For the newly-engaged client: Some goodies to help them plan for the big day (beautiful notebook, ring dish, coffee, cutely-packaged snacks, etc.)
- What colors & textures reflect my brand? Create an inspiration board of potential products!
- Apart from the actual gift items, what branded elements will complement my gift?
- Examples might include…Ribbon, business cards, printed handouts, a client handbook or magazine, etc.
- Examples:
Once you’ve determined the elements going into your client gift, order all of your products at once, so you’ll have them ready for assembly day.

3. Batch Your Client Gifts Ahead of Time
What you’ll need:
For the client gifts:
- Your chosen container x your estimated # of clients for the year ahead
- Crinkle fill, excelsior moss, or other box filler
- All gift products
- Tissue paper for cushioning inside the box/container
- Client handbook or guide, if applicable
- Ribbon & other adornments
- Handwritten cards & envelopes
- Any branded elements (i.e. business cards, handouts)
For shipment:
- Shipping boxes
- Bubble wrap
- Packing tape
- Adhesive labels (if using a label printer)
- Printer for labels
- Optional: Stickers for exterior of box (i.e. “Special Delivery!”)
- Optional: A shipping scale
Best practices:
- If you’re batching gifts, use the same products for every. single. gift. Trust me: There’s no need to create a unique gift for every single client. If you create something reflective of your brand, it will connect + resonate with your clients! Plus, you’re 99.9% more likely to deliver gifts consistently if they’re easy to repeat.
- Create an assembly line of your gift containers & assemble them all at once! This way, you’ll have an “inventory” of gifts ready-to-ship as your clients book (plus, you’ll save TONS of time by batching!).
- Include more crinkle fill than you think you need! The weight of the products will push the crinkle down, creating more margin in the box (which can lead to items jostling around), so be extra generous with your crinkle fill.
- Balance your weight: For example, if you have two heavier items & three lightweight ones, be sure to place the heavier items at opposite corners for better weight distribution.
- Use plenty of tissue paper or cushion material to keep your items in their respective homes within the box. Your goal? Be able to shake the box vigorously, with no movement of items.
- Write your cards ahead of time, leaving space for your clients’ names in each one (it’s okay if your message is the same for each!). Then, as new clients book, you can personalize each card with their names.
- Choose the smallest shipping box possible, that still allows room for a layer of cushioning bubble wrap.
- Batch your shipments. For example, instead of shipping gifts as each client books, ship once monthly or biweekly.
Does DIY feel a little daunting?
You can always outsource to a gifting company! The time cost involved with DIY can often outweigh the ease & simplicity of outsourcing. Whichever path you opt for, make sure it’s something that can become a repeatable part of your workflow.
At the end of the day, gifting is meant to be a relatively low-cost way to exceed expectations, delight your clients, and elevate your brand experience. Cheers and happy gifting!


