Have you ever wanted to make an announcement on Instagram with a text overlay, but struggled to make the image fit with your brand? Or, maybe you’ve wished you could share some of your favorite quotes, but wanted to provide some original, branded content. If you are like a lot of business owners out there, Photoshop can be a little intimidating and while there are a ton of apps you can add text to your images with, you can come away with images for your business that are less than the pretty & polished look you were hoping for.
Today I want to walk you through three simple steps you can follow in Photoshop to create more effective and beautiful announcement images. Plus I’ve designed a [[free template]] for you that you can follow along with and customize to fit your own brand!
Go ahead and open up the template, and let’s make it all yours!
Step 1
Write in your short and sweet text.
In Photoshop, add in the text you’d like the image to have. Figure out the gist of it in as few words as possible. For announcements, be sure to take advantage of using a larger headline and smaller subhead. This will break up your content and make it more scannable. For quotes, you may just need one text size for the quote and one for the author name.
Remember — readers are scrolling through their newsfeeds pretty fast — cramming in too much text is a surefire way to make sure your message is not read. If you do have more specifics and thoughts to share, those are best kept for the caption beneath the image.
Step 2
Choose a photo & layout your text will be readable on.
Pick an image with plenty of whitespace or plan on a design with enough contrast so all your words are really easy to read. One important thing to remember: if readers have to work to get it, they won’t. Make it super easy to read with no squinting needed.
Place an image with a large amount of empty space where you can center your text.
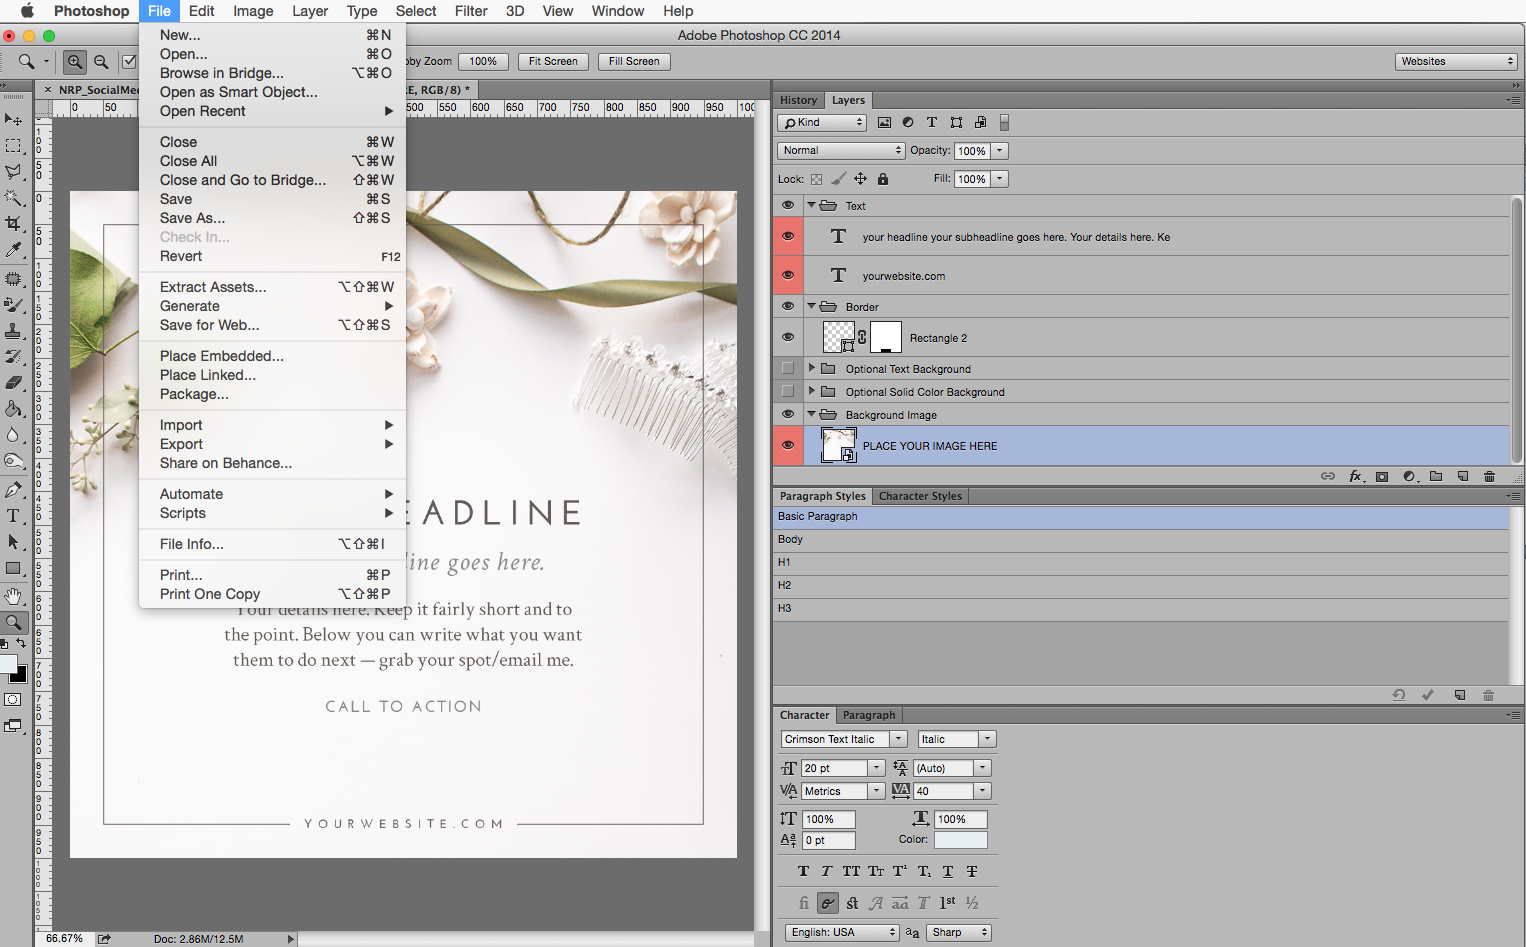
To place an image, drag and drop from your finder window into your Photoshop template or go to file > place embedded. If you pick a denser image, try using an opaque overlay in a light brand color for text to be clearly read on.
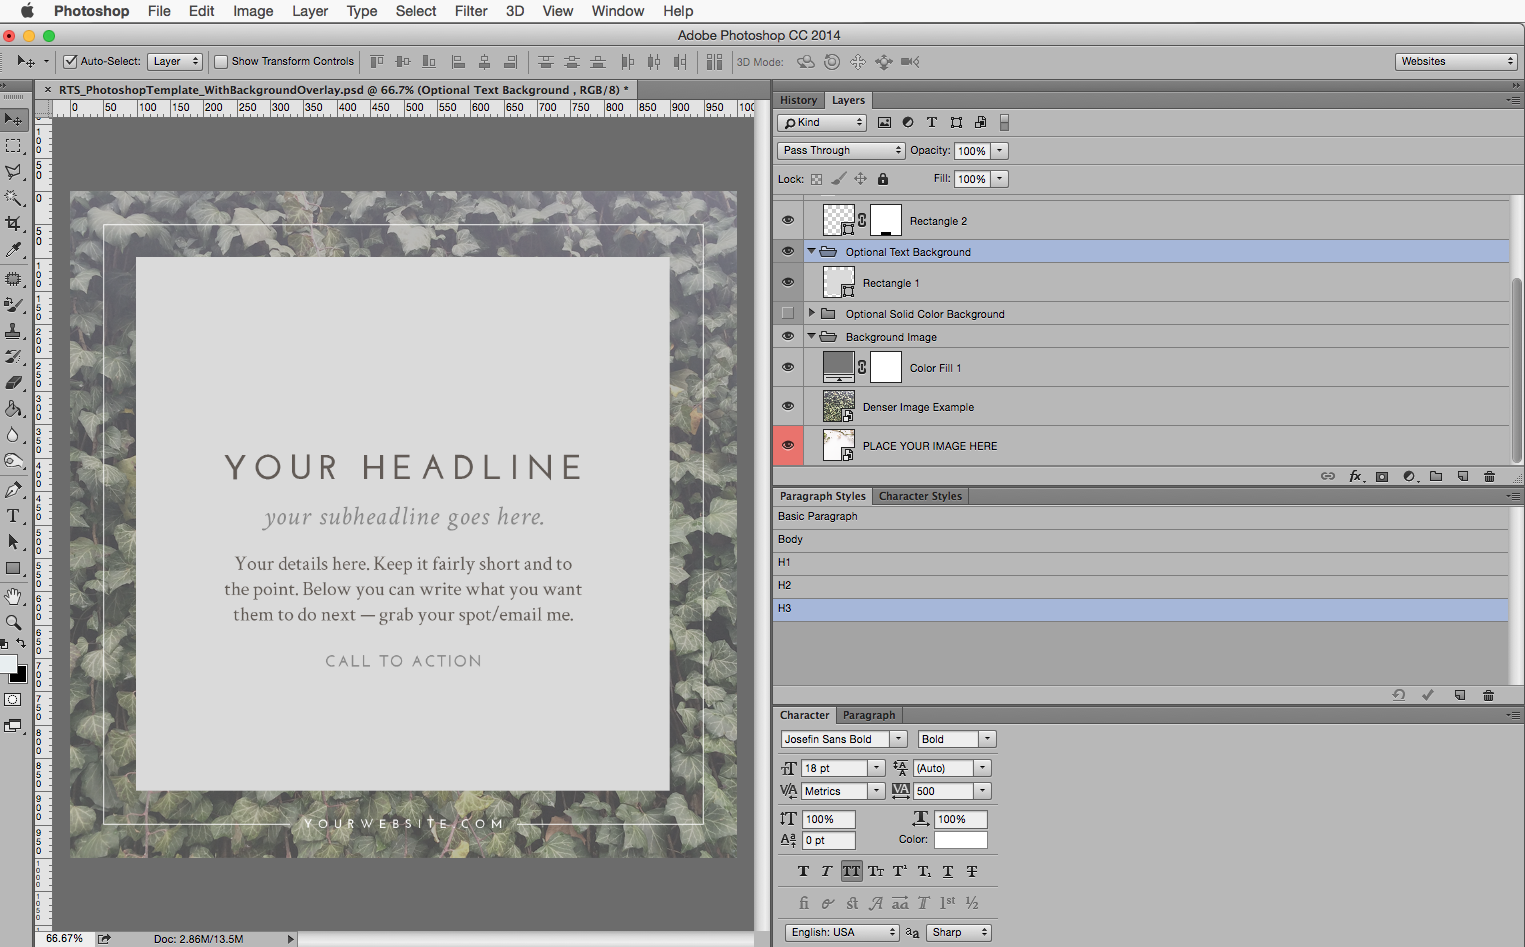
In the Photoshop template, you can do this by turning on the “optional text background layer.” In this example I have set a color fill layer to 50% and also changed the border color and website name to white for ample contract.
Once you have your text and image in there, it’s time for the fun part!
Step 3
Customize to match your brand colors & fonts.
If you don’t already have the info, ask your designer where you can license & download your brand fonts and what your brand colors are. If you don’t have the budget for primo fonts, you can also ask your designer what a good free font alternative would be. Make sure your brand fonts are installed on your hard drive and then you’ll be ready to brand the image with your typefaces.
In this template, I have used free Google fonts you can download here and here.
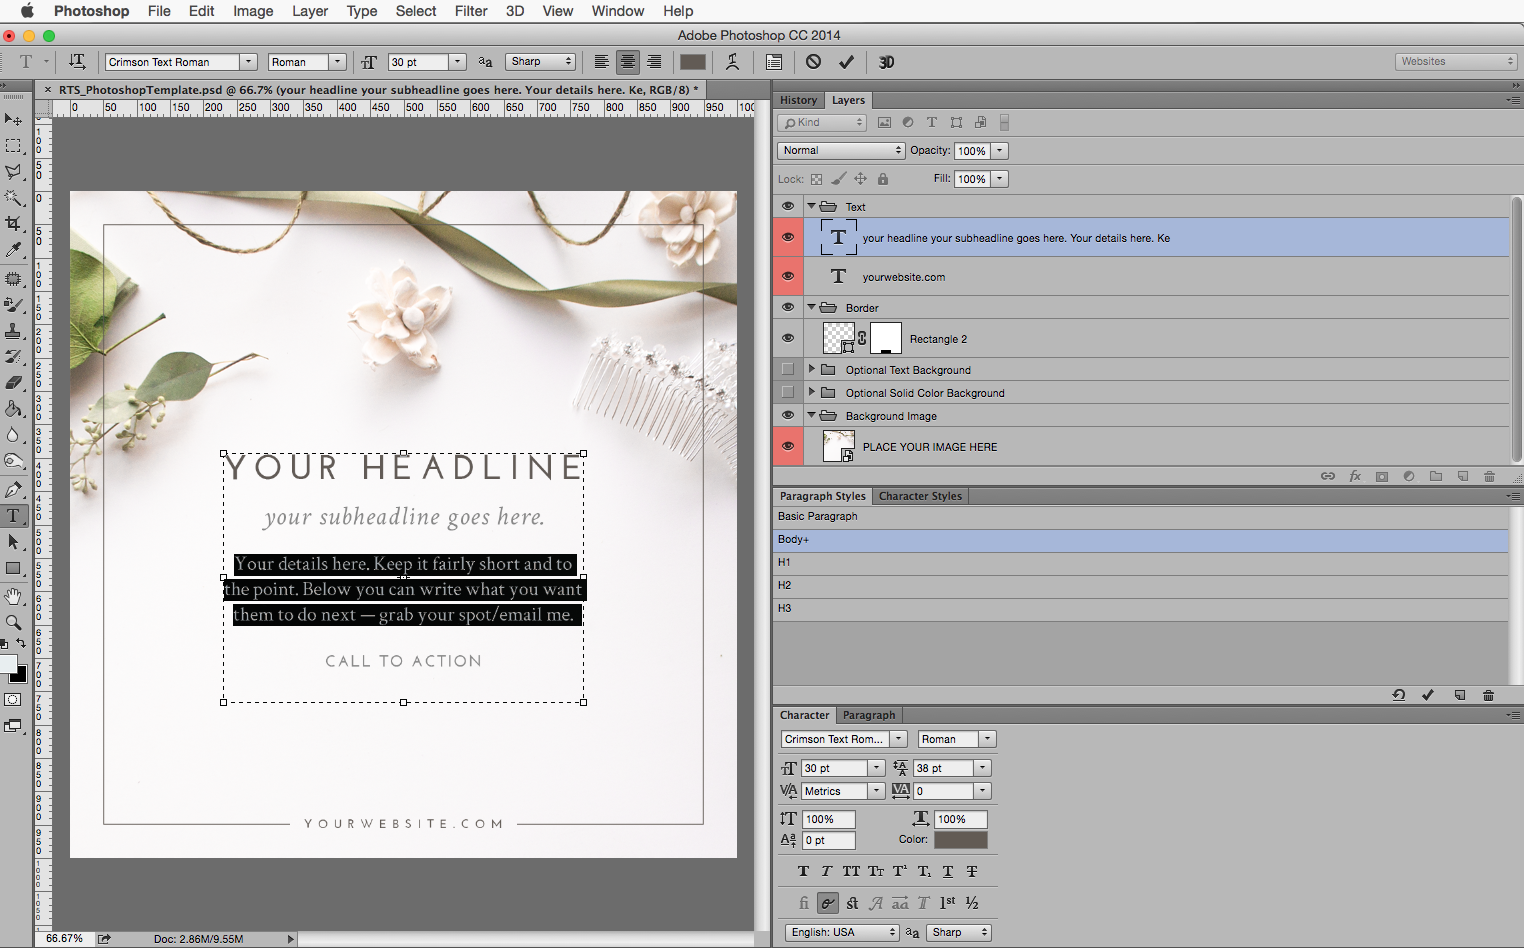
To change your Photoshop fonts, open the Character palette. Then, click on the text area to activate that layer and then select the text you want to change. With the text and layer selected, you can now pick the correct font for your brand from the ones installed on your hard drive. You can also adjust to size or spacing of the letters in the dialog box to match any text styles your designer may have included in your brand board.
Next, you’ll also want to change the colors to match your brand. (For a clean and sophisticated look, I’d recommend sticking with a neutral base color like grey or black and then just adding in 1 of your brand colors in place of the light grey in the template.)

Select the text you want to change the color of and enter the hex color code.
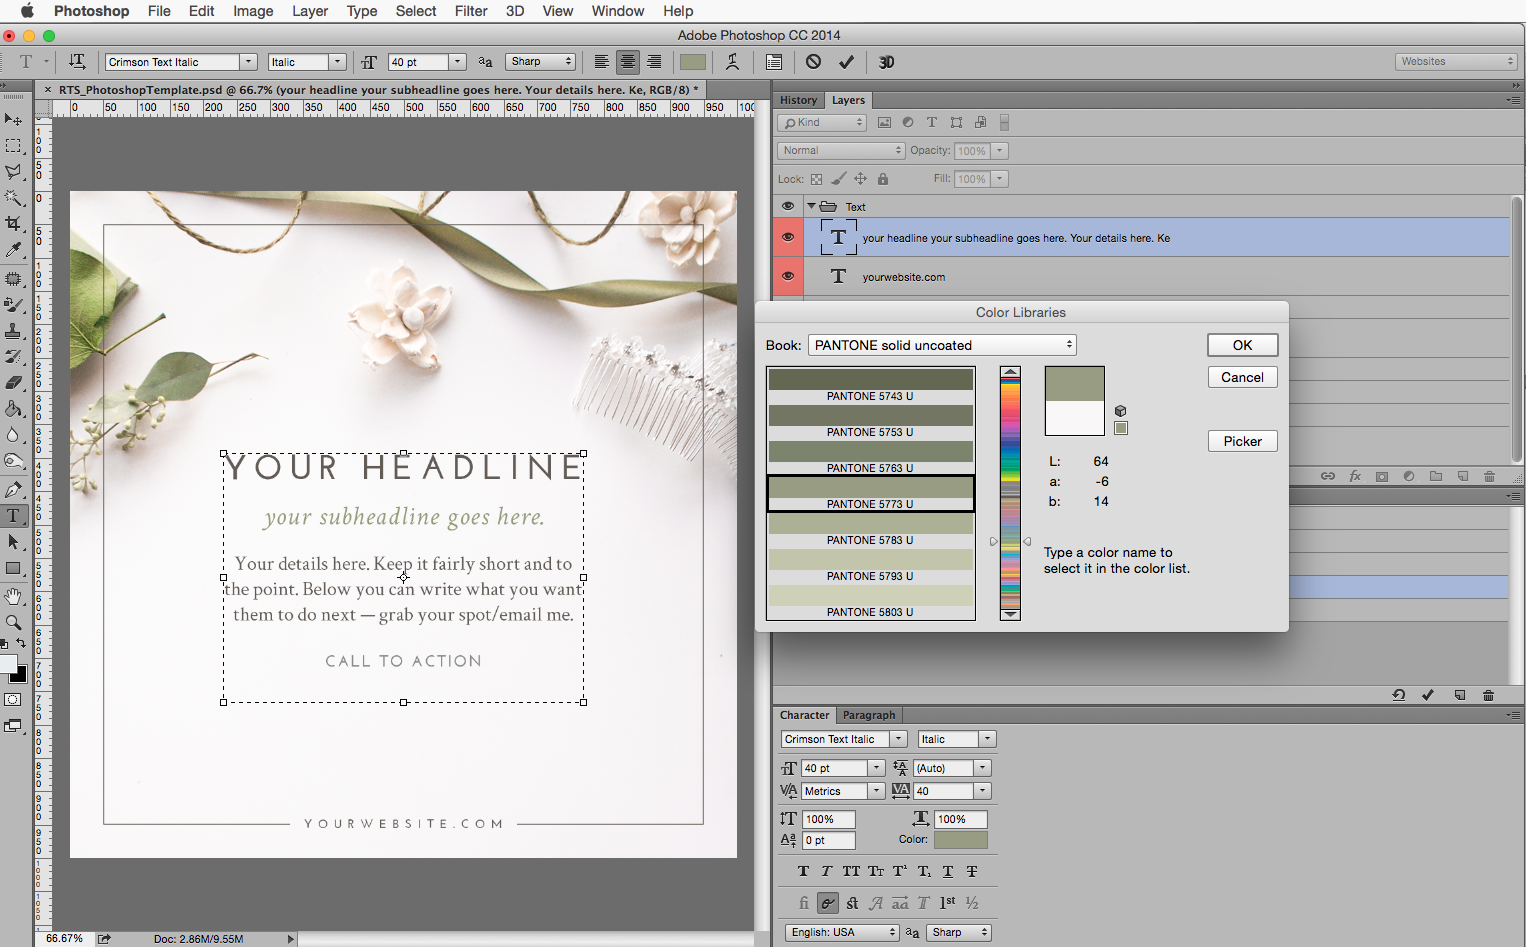
Or, select the pantone color by clicking on “color books” > “solid uncoated.”
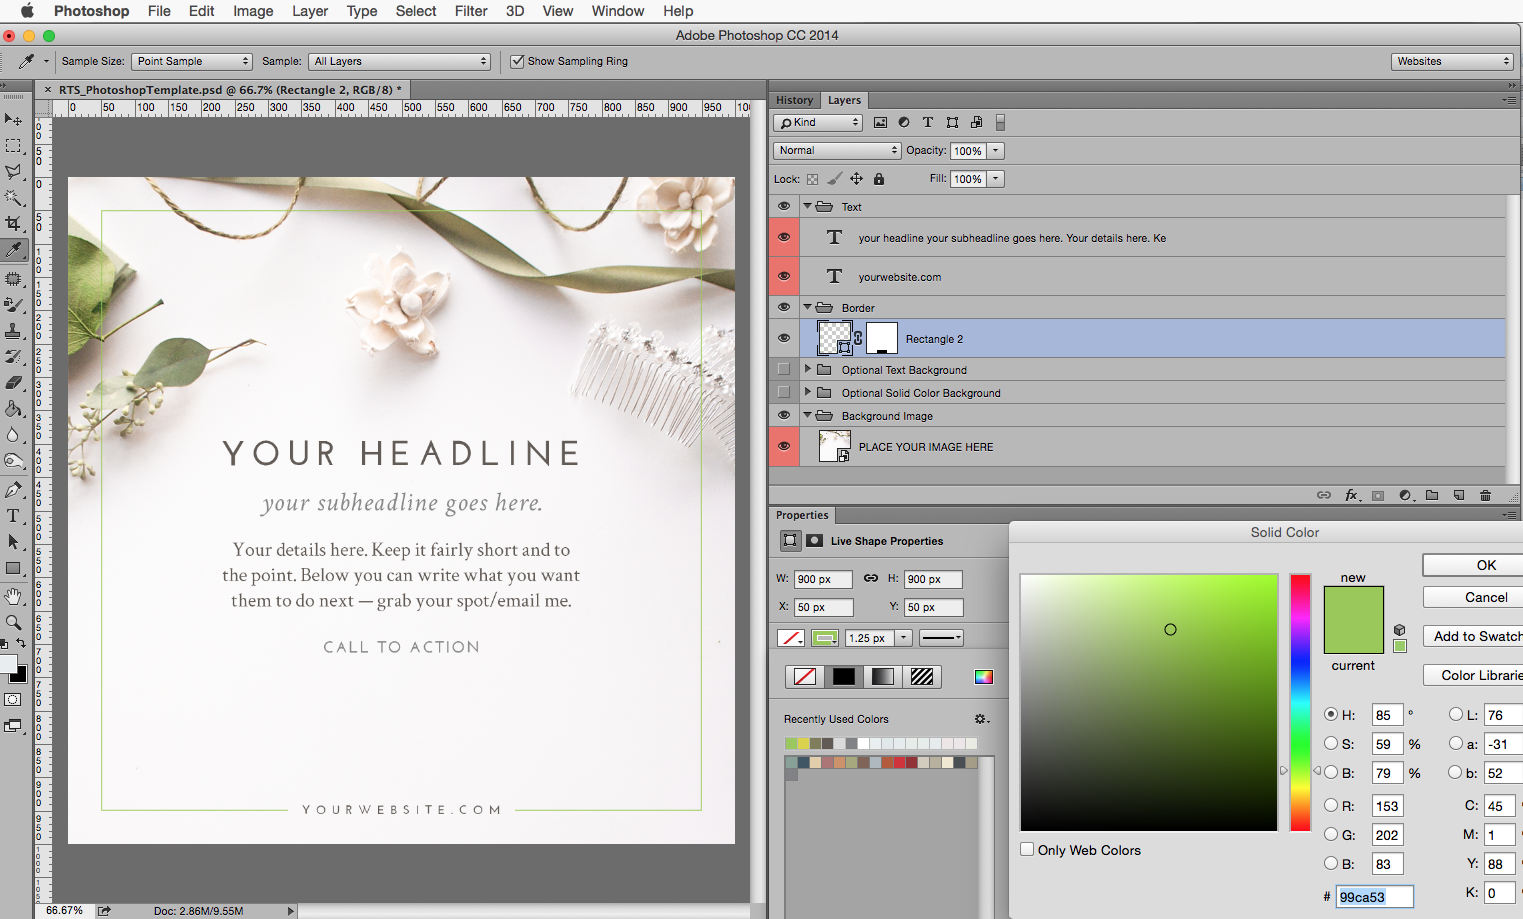
Select the border and change the stroke color in the properties palette.
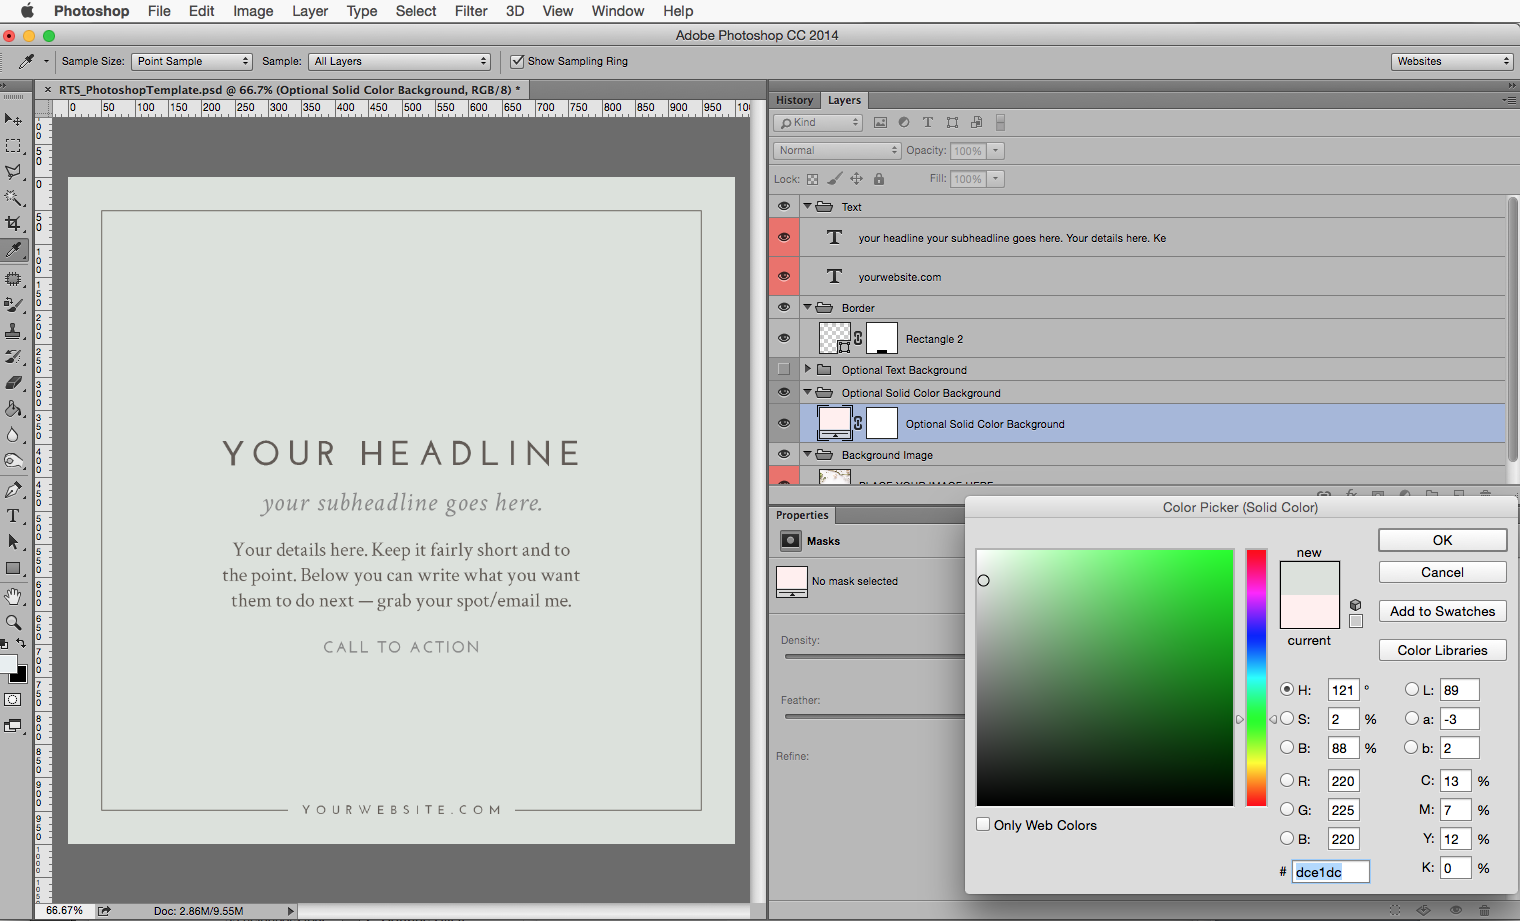
For a different look with no photo, you can turn on the color fill layer in the optional background color folder and change it to a light color that suits your look by double clicking on the colored box next to the layer name.
And, there you have it! An image that fits in with your branding and that can effectively share your message. Wondering what kind of images you can share using your newly acquired skills? Here are just a few ideas to start spreading your brand messaging in style:
- Workshop/product/service announcement
- Booking openings notification
- Mission statement
- Team member introduction
- Inspirational quotes
What other ideas do you have for how you will use this template?
I’d love to hear in the comments below!


